This a very brief, compact introduction on how to align image stacks in TrakEM2.
1.open Fiji (download: https://imagej.net/Fiji/Downloads) : choose File in the sidebar –>Import –> Image Sequence
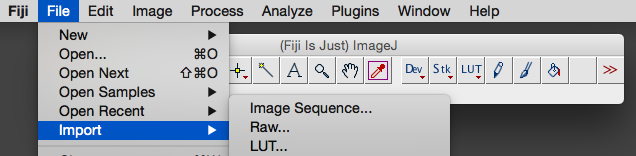
2. Choose the folder with all your images (mac) or open the folder and click on the first image (PC) and select the open button below.
3. the following menu opens: highlight the option use virtual stack and hit ok
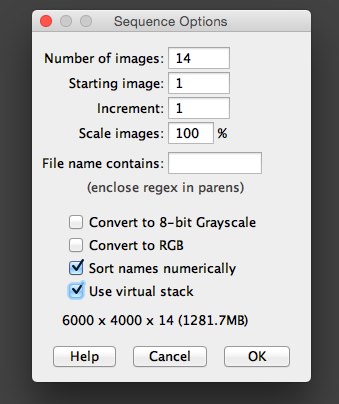
4. an additional window with your image stack will open (might take quite a time if the number of images (and their file size) is large)
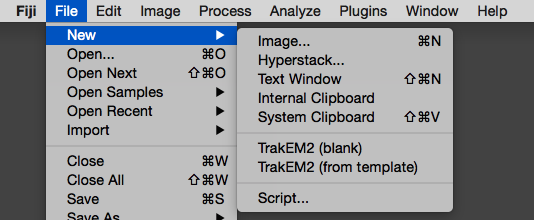
5. click on File in the sidebar : –> new –> TrakEM2 (blank)
6. this opens two windows: the first is a management window, where the organization of the project is done
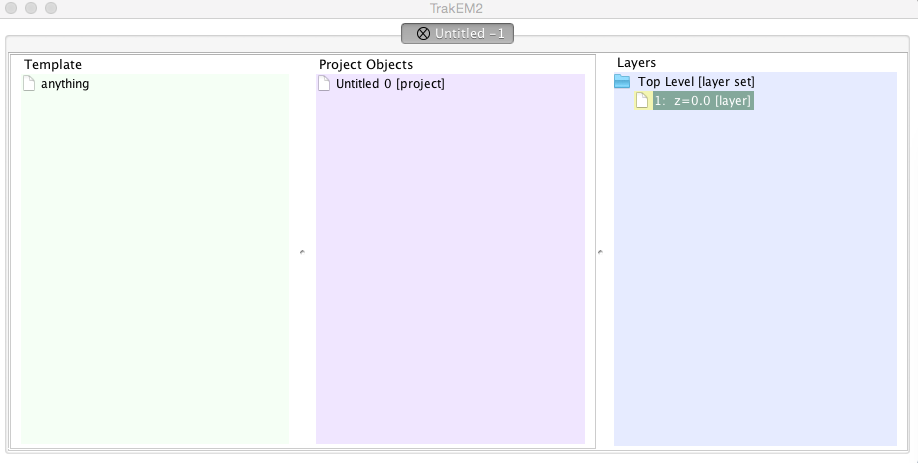
7.the second is the window showing the working space including a toolbar on the left
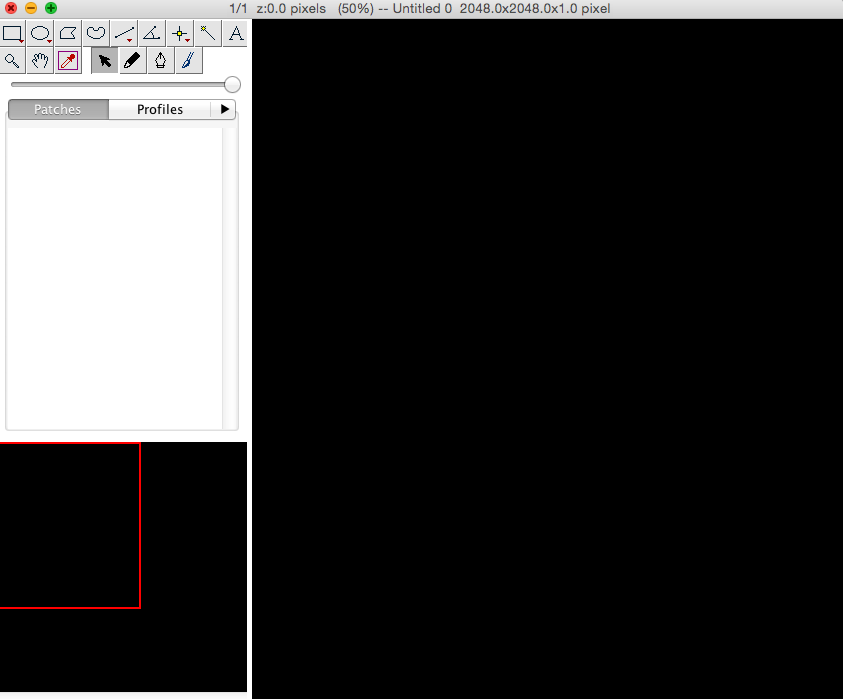
8. a right click into the large black space (canvas) opens a drop down menu. Here you find all needed functions for the further work
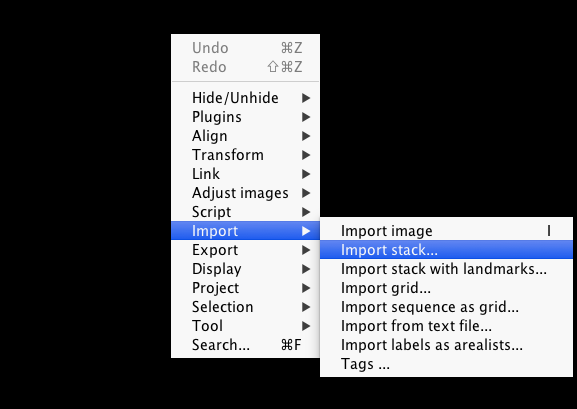
9. this time choose –> import –> import stack
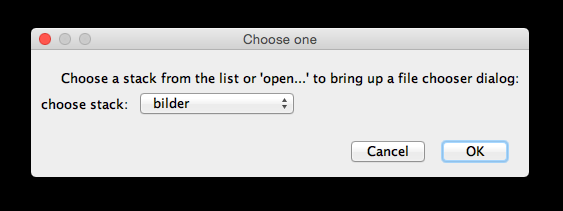
10. this opens the following menu: it will present to you the opened image stack from step 5, just click „ok“
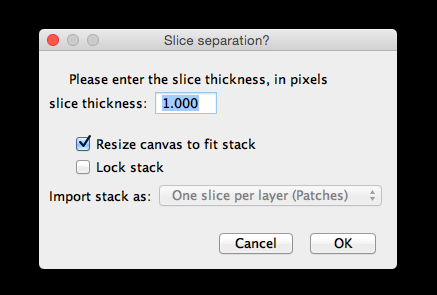
11.In the following we can choose the slice thickness of each image. This can also be done later. Hit ok.
12.in the following all images are imported into the project and get listed in the Layers list in the management window. In this case 14 images
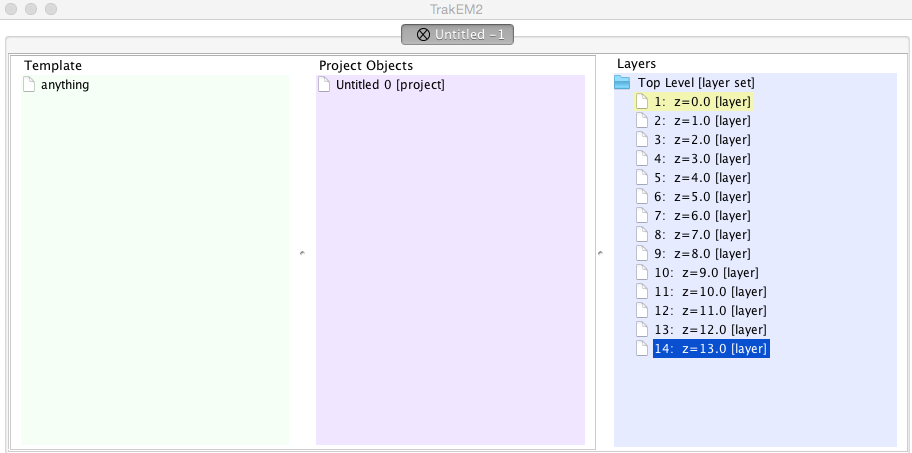
13. in the project window you can now scroll trough your images (scroll wheel on your mouse, arrows on the keyboard), but the images are not aligned yet. If you can only see a part of your images, click on the magnification tool and press „alt“ and click into the project window.
14. save your project: right click in the canvas –> project –> save as. Usually it is best to save the project within the folder of the images.
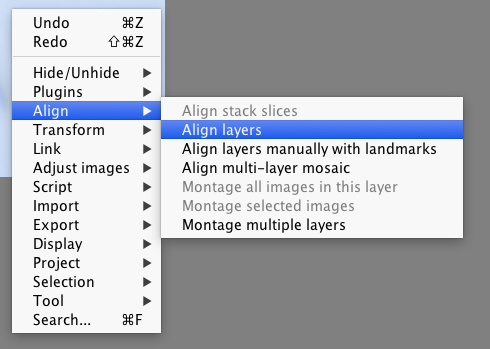
15. in order to start the alignment of the images: right-click onto the canvas: –> align –>align layers
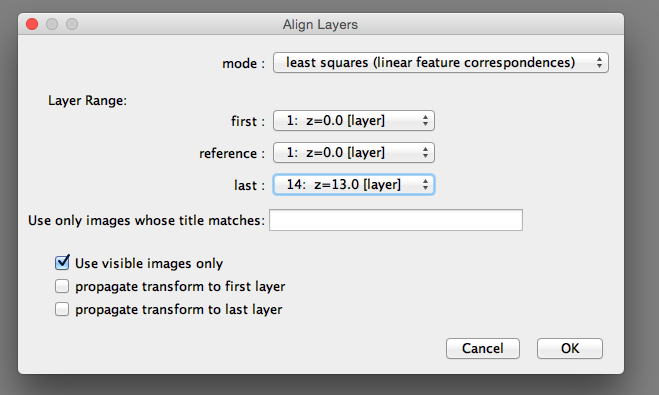
16. for a first rough alignment we will use the least squares alignment. We are able to select the layer range we want to align and to select a reference image (choose one without artefacts, such as folds, dirt etc.) and hit „ok“. The options propagate transform to first/last layer are only of interest if not the complete stack is chosen.
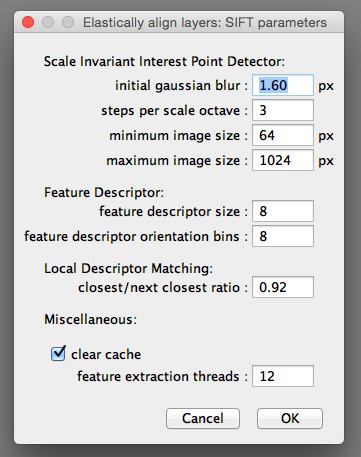
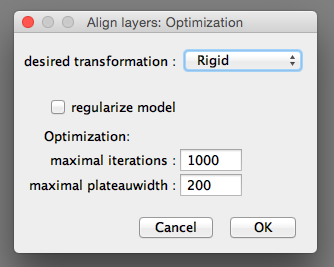
17.in the following TrakEM2 asks for the values used for the alignment. Start with the standard settings for the beginning. If you like you can hit „ignore constant background“ button in the second window.

18. After some minutes, your Image stack will (at least) roughly be aligned.
19. save project: right click in the canvas –>project –> save
[…] your images have been imported to TrakEM2 and aligned (see here), the project needs to be organized in order to start the […]
[…] a first rough alignment (see here), it makes sense to start a second run only using a region of the stack containing the object of […]
[…] commercial packages (Amira, Imaris, VGstudio etc.) .Export ist easily done after the alignment (see here), either as export of the complete canvas (everything visible in the window) or of an region of […]