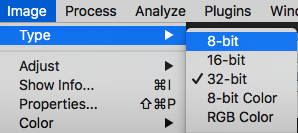
Often the bit range of images needs to be adapted in order to be able to handle these files on specific computers (file size versus RAM limitations) or due to the reason that some plugins or software specifically need 8bit (or 16bit) images to work. When using the regular conversion by just by switching the bit range under Image / Type from e.g. 16bit to 8bit in FIJI, one will notice that contrast differences between slices/images can occur as the result of different gray value ranges in the two different images.
These differences then look unattractive and prevent homogenous surfaces in volume renderings. This can however be easily avoided by a small change in the workflow: After opening the image stack, open brightness/contrast (Image/Adjust/Brightness contrast). Scroll through the image stack to find a slice with largest differences in grey values (brightness) in a single image. Adapt the Minimum and Maximium sliders to define a suitable range (no need to hit Apply!).
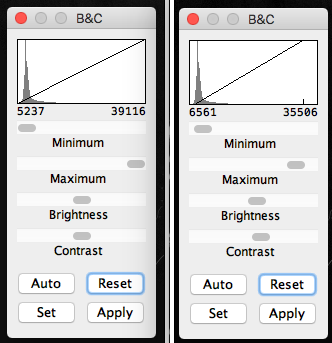
When we now change the bit range (as done before (Image / type)), FIJI will take these Minimum and Maximium values to scale all images down in the same way and the resulting images do not reveal contrast differences and therefore produce a homogeneous impression in volume renderings.
What to do if not sufficient RAM is available?
It can happen that FIJI just processes a part of a very large image stack and stops when the RAM capacities are filled.
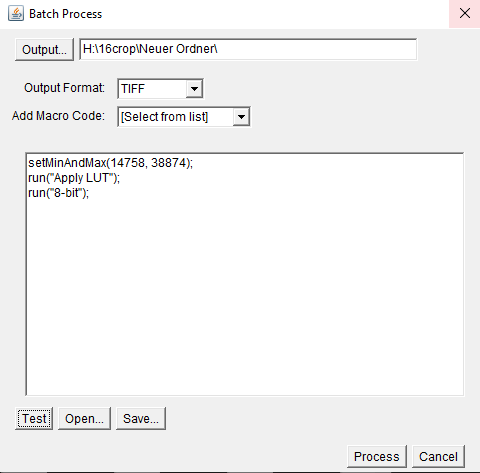
In this case make sure to click “use virtual stack” when importing the image sequence and use the batch function for virtual stacks (Process / Batch / virtual stack). Select an output folder and copy the following macro. The Min (14758 in this case) and Max (38874) values can be adapted as needed. Hit Process and 8bit converted files will be saved.